I will provide instructions for Openoffice, Microsoft Office 2003, 2007/2010 and Office for Mac.
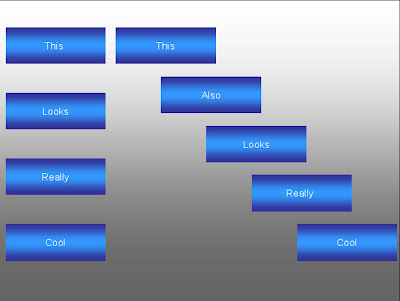
Mission: To align and distribute these objects
Figure: With align and distribute and without align and distribute
As you can see, the difference between manual placement and using align and distribute is very noticeable. It is also much faster to use align and distribute instead. I probably spent more time placing the boxes manually than using align and distribute and it still looks pretty sloppy.
Let's start with the simple example shown above. I will walk you through on how to achieve this. Later, I will also include some more complex examples that will show you the power of this tool.
Part 1: Where are these tools?
Openoffice or Libreoffice:
On Openoffice, you only need to select the objects that you want to align/distribute and then right click to find the alignment and distribution tools. Here is a screenshot.
The aligment menu will show you the various options. Clicking on distribution will bring up a window like this.
Powerpoint 2003:
In Powerpoint 2003, these tools can be found in the Draw toolbar at the bottom. If you can't see it make sure that you have enabled the Drawing toolbar under View>Toolbars.
Figure: Align and Distribute in Powerpoint 2003
Powerpoint 2007/10:
They are located on the home tab, under the "Arrange" menu:
Powerpoint for Mac:
Selecting the objects that you wish to align/distribute will give you the menu as shown below.
Figure: Align/Distribute on a Mac
Part 2: Align-Distribute
Align
First let's tackle the column of boxes on the left. The first problem is that they are not in a straight line. To solve this we can use the align tool. If I were to use Align left, all of the boxes will be aligned with the leftmost box "Really", but it is too close to the edge for my liking so I will choose to align right.
Here is the result
Distribute
Distributing vertically will evenly space the boxes.
Next, you can top align both of the boxes that say "This", and then horizontally and vertically distribute the cascading boxes so that you get the end result.

As promised, here are some examples to show you what you can achieve with this tool.
Example 1:
Example 2:
Example 3:
Example 4:
Align-distribute is really powerful and if used properly, will stun your audience. Animations are annoying, this is stunning. You will be able to harness the full power of the software you use and make your presentation more than a boring template with text boxes and bullet points. Enjoy!


No comments:
Post a Comment